

By Danielle Crull, ABOM
You’ve probably had a few patients who present with nystagmus. They are patients whose eyes move or oscillate involuntarily. If you try to take their pupillary distance (P.D.) in the pupillometer, you’ll often notice that these movements become more rapid, making it difficult to get the correct measurements.
Congenital nystagmus will present within a few weeks or months after birth. As the child grows, generally school age, they often find a “null point.” A null point is the place in their vision where the eyes move the least and therefore give them the clearest vision. Once the child knows where this place is, they will seek it out for viewing their world. Occasionally, the null point is straight ahead and that’s great and nothing extra is needed to obtain their P.D. measurement. However, more often than not, the null point is located off to either the right or left side. If you can see better off to the side but need to see straight ahead, the natural thing to do is to turn your head. So many kids as they get older become aware of this point in their vision and subsequently begin to develop a head turn in order to see more clearly.
As opticians we need to be aware of this and position optical centers accordingly. The first step is to observe. If you have a patient with nystagmus, don’t direct their head into a pupillometer to measure. Instead observe them for a few moments. Have them look in the distance and up close. If you see any kind of head turn then we must measure their PD without a pupillometer.
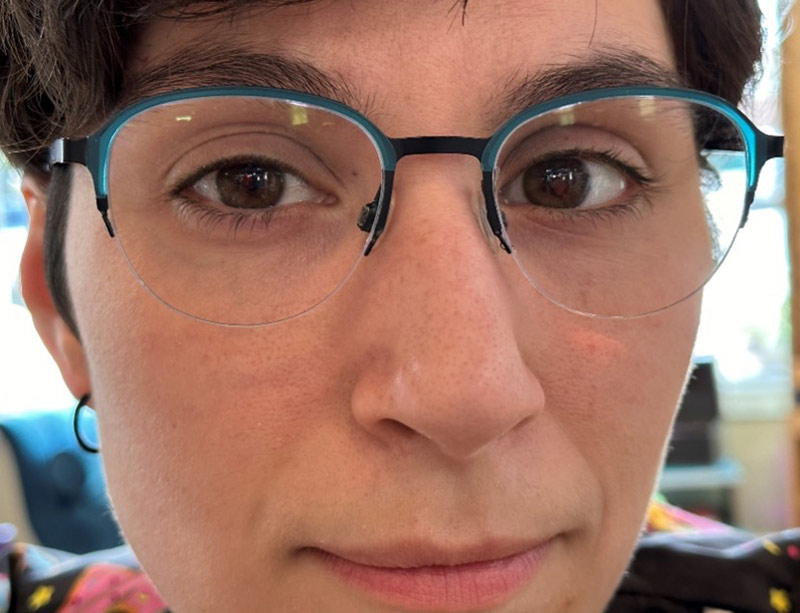
Patient with nystagmus
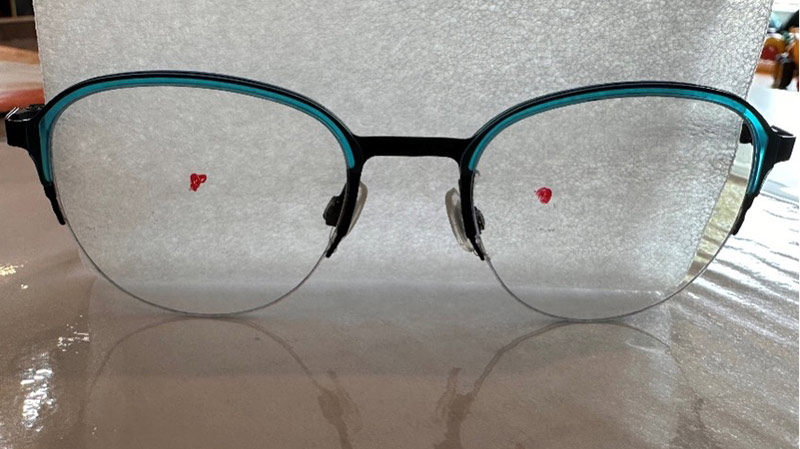
PD marked for null point
There are two ways to observe. First by being in front of them but below eye level and the second is to look from behind. When you look from behind, ask the patient to look at an item straight ahead. It's easy to see if the patient's head aligns with the item they are looking at. Their nose should be pointing right at it. If your patient has a null point with a head turn, you’ll see the head gently settle into a turned position and stay there. This means they have chosen a place that gives them the clearest vision.
In this case, we cannot use a pupillometer to take the P.D., because that only finds the P.D. when looking straight ahead. Instead we will need to take it by hand. It is very important that you do not ever move the patient's head or direct their chin. Once they have chosen their frames, put them on and make sure they are properly adjusted. Ask them to look at something in the distance. Here’s a good tip, ask them to describe what they see, this way they will naturally seek out their clearest vision to identify it for you. From the front you can often see this easily as the movements of their eyes slow and can even become completely still when they find their null point. Now dot the pupil centers when you are positioned straight in front of them. I like to use a red pen, because it will make everything appear red when you have marked the correct spot. You can ask the child if everything looks tinted red. If they say it is, then you know you have found the proper location.
Measure the optical centers as a monocular P.D. to the center of the bridge on the frame and don’t forget the optical center height as well. Make sure to document that the P.D. measurement referenced is at the patient’s null point. This is important because the pupillary distance measurement will look very uneven and may be presumed to be a mistake by the lab if not noted. By taking a little extra time to observe your patient, you’ll be placing the clearest vision over the area that your patient prefers to view their life.